


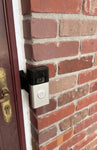
Ring Doorbell Gen 2 (2020) Standard Offset Brick Extension Mount (5/8" Offset)
Compatibility Check: Ring Battery Doorbell (Gen 2 - 2020, Integrated Battery) ONLY!
- Fits ONLY: The Ring Battery Video Doorbell (2nd Generation) released in 2020 and 2025. This model has an **integrated (non-removable) battery** and charges via the orange button on the back. Also fits original Gen 1 model with integrated battery.
- Please confirm your model matches the pictures below:
-

(Example Image - Click for Amazon Link. As an Amazon Associate, I earn from qualifying purchases.)
- WILL NOT FIT: Ring models with REMOVABLE batteries (Ring 2, 3, 4, Battery Plus/Pro), or ANY Pro/Pro 2/Wired models.
- Surface Width: Requires mounting surface (trim/molding) to be AT LEAST 9/16 inches wide.
Confused by Ring models? Check our Ring Model Guide or contact us!
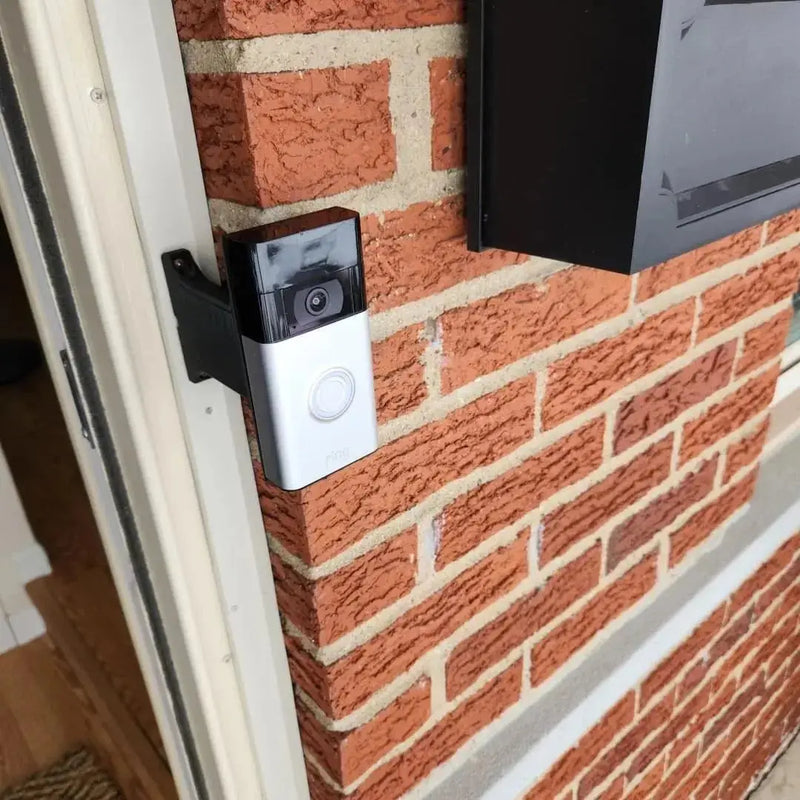
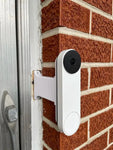
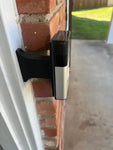
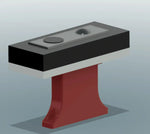
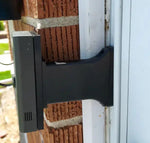
Extend Your Ring Gen 2 Past Brick with Standard Offset!
Is your Ring Doorbell (Gen 2, 2020 Integrated Battery model) installed on trim that's set back from your brick or stone siding? This **Standard Offset Brick Extension Mount** is designed to bring your doorbell forward for better visibility and access, while providing a moderate sideways offset. Mounts easily to your existing trim (minimum 9/16" wide), avoiding drilling into masonry.
How it Works: Standard Offset (5/8")
This mount features our widely compatible STANDARD OFFSET, which shifts the center of the doorbell approximately 5/8 inches horizontally towards the brick side relative to the center of the mount's base.
On our standard 9/16" wide base, this typically leaves about 7/16 inches of the base visible on the side closest to the door frame. This "Standard Offset" works well for many installations, positioning the doorbell partially over the brick.
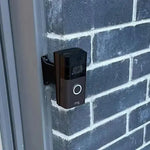
This mount positions the doorbell over or in front of the brick face, not flush with it.
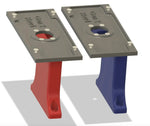
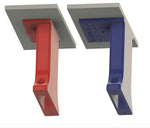
Standard Offset (This Product) vs Full Offset:

Need Maximum Sideways Clearance? Click for the Full Offset version (requires >=9/16" trim).
Base Dimensions & Mounting: The standard mounting base for offset extensions is 9/16 inches wide (requires >= 9/16" surface). Standard mounting hole spacing is 2.5 inches (center-to-center). Ensure adequate flat mounting surface on trim. Use appropriate screws for trim material (not included for wall attachment).
Angled Trim? If your trim is angled, add our Angle Shims (5°, 10°, 15° Options) to correct the angle (sold separately).
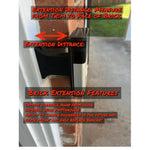
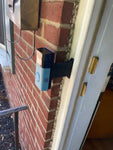
CRITICAL: Measure & Select Your Extension Length!
Choosing the correct extension length ensures the mount clears your brickwork. Measure carefully:
- Measure the exact distance straight out from the surface where the mount base will attach (your trim) to the outermost face of your brick.
- Order THIS measurement as your required Extension Length. (Do NOT subtract doorbell thickness for offset mounts).
Select the required extension length from the dropdown menu when ordering. (Min. 1/4 inch).
Need help measuring? Text/email a picture of your setup! (Contact info below)
Key Features & Benefits:
- Perfect Fit: For Ring Video Doorbell Gen 2 (2020, Integrated Battery) & Gen 1.
- Standard 5/8" Offset: Shifts doorbell sideways for good clearance and view in many situations.
- "Over Brick" Placement: Extends doorbell forward past brick, positioning it partially over the brick face.
- Avoid Drilling Brick: Mounts to existing trim (>=9/16" wide, Std. 2.5" hole spacing).
- Selectable Extension Length: Order the precise depth needed (Trim-to-Brick Face measurement).
- Narrow Base (9/16" Std): Fits most standard trim widths.
- Wire Passthrough: Internal channel for optional hardwiring.
- Durable PETG Construction: Strong, weather-resistant plastic.
- Add-on Compatible: Works with angle shims, angle adapters, fillers etc.
- Future-Proof Base: Compatible with replacement brackets for future doorbell upgrades (available here).
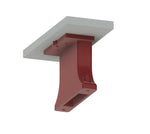
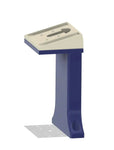
How to Install Your Standard Offset Extension
This mount uses two main printed pieces: the Extension Base and the Doorbell Adapter Bracket.
-
Tools & Prep: Gather: Drill, PH1 & PH2 Philips Screwdrivers/Bits, Level, Anchors (if needed for wall).
Turn OFF power at the breaker if hardwiring! Ensure doorbell is charged if using battery.
-
Mount Extension Base: Position the Extension Base (piece with selected length/offset) on your trim over wires (ensure offset is correct side). Attach securely using appropriate screws (#6 size likely, use PH2) and anchors if needed into the 2.5" spaced holes.
Drill pilot holes. Don't overtighten base screws. Ensure base is level.
-
Attach Doorbell Adapter Bracket: Route wires through the Doorbell Adapter Bracket (top piece for Gen 2). Align this bracket onto the front of the mounted Extension Base. Attach using the four small center screws provided (Size #4 screws / PH1 driver).
Use correct PH1 bit. Tighten until bracket is flush and secure. Check for/clear any plastic debris in pilot holes if needed. Do NOT over-torque.
- Wire Doorbell (If Applicable): Connect wires to your Ring Doorbell Gen 2 following Ring's instructions (if hardwiring). Tuck excess wire.
-
Attach Ring Doorbell:
- First, securely screw the plastic mounting bracket that came WITH YOUR RING DOORBELL onto the Doorbell Adapter Bracket using the small screws PROVIDED WITH THIS MOUNT (likely #4 / PH1).
- Then, clip/attach your Ring Doorbell (Gen 2) onto **its own bracket**. Secure with Ring's security screws (using Ring's tool) at the bottom.
Do NOT use Ring's long wall screws here. Use correct driver sizes for our screws and Ring's security screws. BUT DO use Rings Screws for Security Screws. - Final Check & Power On: Ensure doorbell is secure. Turn power back on (if applicable) and test.
Follow safety rules & Ring's guidelines. Use correct anchors/screws for your wall type. Correct screwdriver size prevents stripping.
Optional Add-ons & Accessories:
Further customize your installation:
-
 Angle Shims (5°, 10°, 15°)
Corrects for angled trim to ensure your extension points straight out.
-

 Horizontal Angle Adapter or Swivel Add-on
Add horizontal angle adjustment to the end of the extension.
-
 Bottom Filler Spacer Plate
Fills the gap below the extension base on angled/uneven trim.
-
 Body Shim Filler Plate
Fills gaps between the extension body and uneven brick.
-
 Add Side Wire Entry
Adds side entry holes ("mouse holes") to the base for side-exiting wires.
Product Examples
(See listing photos for details or contact us for more examples!)
Need Help? Confirm Compatibility & Measurements!
Ring models are confusing! Ensure you have the Gen 2 (2020, Integrated Battery). Need help measuring or choosing options?
- Email: shop@doorbellmount.com (Send Pictures!)
- Text/Call: 1-833-326-6868 (Text Pictures!)
Standard Color: Black. For other colors, add the Color Change Request item.
Doorbell Not Included. Includes the 2-piece extension mount (Extension Base + Doorbell Adapter Bracket) and necessary assembly screws.
PETG Material: Printed in durable, outdoor-rated PETG.
3D Printed Quality: Minor cosmetic variations inherent to 3D printing may exist but do not affect function. Contact us with quality concerns before reviewing.
Order your Standard Offset Brick Extension for the Ring Doorbell Gen 2 today! Remember to measure carefully (Trim to Brick Face!) and select your required extension length.