

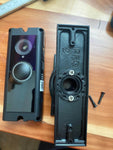
0-35° Adjustable Swivel Doorbell Mount | Fits the Cove Doorbell Cam
A Swivel Mount Built for the Cove Doorbell Cam
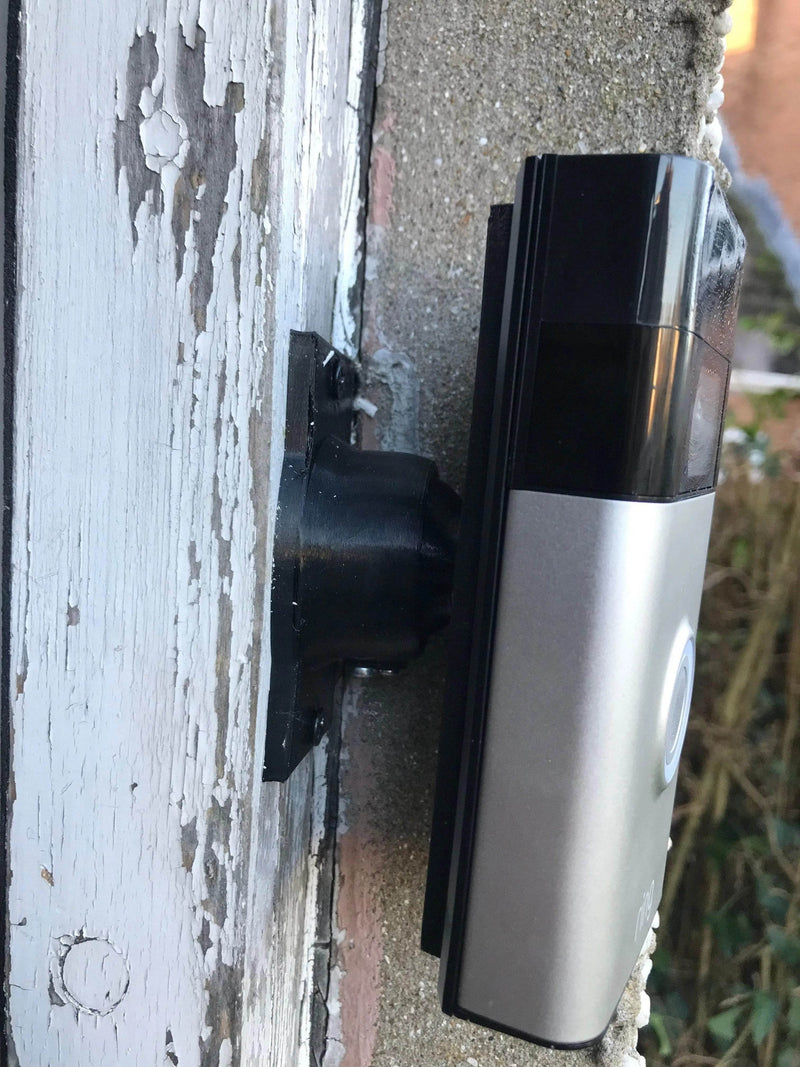
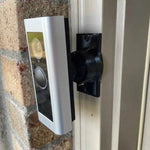
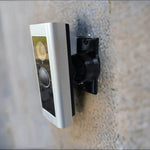
This is a 0-35° adjustable swivel mount for the Cove Doorbell Cam — the tall, slim video doorbell that ships with Cove's home security system and runs either on its built-in rechargeable battery or off your existing doorbell wiring. The mount bolts to your wall or door trim, and a Cove-specific adapter bracket snaps the doorbell onto a swivel joint so you can turn the camera up to 35° left, right, up, or down. Your Cove stays perfectly upright while the camera points where you actually need it — at the walkway, at the steps, or away from the street.
Cove's own backplate screws flat to the wall and gives you no aim at all. If your Cove is watching the neighbor's driveway instead of your front door, or triggering every time a car goes by, this is the fix.
Still shopping for the doorbell itself? See the Cove Doorbell Camera product page for current specs and pricing.
Fits the Cove Doorbell Cam — Battery or Hardwired
- Cove Doorbell Cam — the 180° field-of-view doorbell with radar motion detection.
- Works whether you run it on the rechargeable battery or hardwired to a transformer (up to 24 VAC).
- The adapter bracket is cut to the Cove's own screw spacing and leaves the center wire opening clear, so hardwired installs route exactly like stock.
- This mount replaces Cove's flat backplate. Keep your original backplate and screws in case you move the doorbell later.
- Not a Cove owner? We make this same mount for over 100 doorbell models — pick your model here.
Why 0-35° Is the Right Range for a Cove
The Cove Doorbell Cam already sees 180° side to side, so you rarely need a hard 90° turn. What you usually need is a nudge — 10° to 25° of turn to stop watching the street, or a few degrees of downward tilt so you see faces and packages instead of sky.
That is exactly what this mount does. The swivel joint moves smoothly through the full 0° to 35° arc on two axes at once, and set screws lock it where you leave it.
Mount it either way: the base installs vertically or horizontally and your doorbell still reads upright in the Cove app.
Need a sharper turn than 35° for a side wall or a deep porch corner? Read where to use a 90° swivel mount instead.
Mount Dimensions
- Base Width: 1.8 inches
- Base Height: 3.1 inches
- Base Hole Spacing: 2-5/8 inches (center-to-center)
- Total Extension (at 0°): approx. 1.5 inches from the wall
- Material: PETG, 3D printed in the USA — UV and weather resistant
The Cove adapter bracket sits on top of this base. Because the base is our standard universal base, if you ever switch doorbells you only need a new bracket — not a whole new mount.
Key Features & Benefits
- 0-35° dual-axis aim: turn and tilt the Cove in one motion, then lock it.
- Cove-specific bracket: matched to the Cove Doorbell Cam's screw spacing and back profile.
- Clear wire pass-through: hardwired Cove installs route through the center, same as the factory backplate.
- Fits narrow trim: the 1.8 inch base works on door casing and siding where the stock plate will not sit flat.
- Secure locking: set screws hold the angle through wind, weather, and package deliveries.
- Complete kit: swivel base, Cove adapter bracket, and mounting screws included.
- Future-proof: universal base — change doorbells later, keep the mount.
Getting the Most Out of a Cove Doorbell Cam
A few things worth knowing before you mount:
- Height matters more than you think. Too high and the camera sees the tops of heads; too low and it misses faces. See how high to mount your video doorbell.
- Cove's radar detection has a direction. Because the Cove pairs mmWave radar with a PIR sensor, aiming the body toward the approach path — not parallel to the house — cuts down on missed and false triggers.
- Some Cove AI features need the Premium plan. Person, package, pet, and vehicle detection are plan-gated on Cove's side. If subscriptions are a sticking point, see our rundown of doorbells that work without a subscription.
- Running it on battery? A plug-in chime keeps you from missing the ring indoors — plug-in doorbell chimes on Amazon — and a spare USB-C cable makes recharging less of a chore. As an Amazon Associate we earn from qualifying purchases.
Cove's own documentation: Doorbell Camera Pairing and Mounting · Installing the Cove Spacer
How to Install Your Cove Doorbell Cam on This Swivel Mount
-
Tools & prep: drill, PH1 and PH2 Phillips drivers, pencil, and wall anchors if you are going into brick, stucco, or masonry (Cove specifies a 15/64 inch / 6 mm bit for their anchors).
If your Cove is hardwired, turn the power OFF at the breaker before you touch the wires.
- Remove the Cove from its backplate. Use the removal pin that came in the Cove box to release the camera, then unscrew Cove's backplate from the wall. Set both aside — do not throw them away.
-
Mount the swivel base. Route the doorbell wires through the opening in the base, hold it where you want the doorbell, mark the two holes, and fasten with the #6 screws using a PH2 driver.
Drill pilot holes in hard trim. Snug is enough — do not crank down on plastic.
-
Attach the Cove adapter bracket. Pull the wires through the bracket's center opening, line it up on the swivel head, and fasten with the four #4 screws using a PH1 driver.
Use the PH1 bit, not PH2 — the smaller screws strip easily.
- Set your angle. Swing the swivel anywhere in the 0-35° range, aiming toward your walkway, and lightly snug the set screws.
- Wire it up (hardwired only). Connect the two doorbell wires to the Cove's terminals per Cove's instructions and tuck the slack back into the wall opening.
- Snap the Cove on. Line the grooves on the back of the camera up with the teeth on the bracket and press until it seats. The lip covers the top flap on the left side, same as the factory plate.
-
Fine-tune and lock. Open the Cove app, check the live view, adjust until the walkway fills the frame, then gently tighten the set screws for good.
Do not overtighten the set screws — they only need to stop movement.
- Power back on and test. Restore the breaker, press the button, confirm the chime and live view, then walk the approach path to check that motion triggers where you want it.
Follow Cove's own wiring guidance and all local electrical rules. Use the correct driver sizes.
Cove Doorbell Mount FAQ
Will this mount fit my Cove Doorbell Cam?
Yes. The adapter bracket is made for the Cove Doorbell Cam and matches its screw spacing and back profile, including the groove-and-teeth retention and the clear center wire opening. It fits both the battery-powered and hardwired setups.
Do I lose the wired connection if I use this mount?
No. The base and the bracket both have an open center channel, so your existing doorbell wires pass straight through just like they do with Cove's own backplate.
How far does this mount turn the camera?
Up to 35° from flat, on two axes — left, right, up, or down, or any combination. For a side wall or a true 90° turn, use our 15-90° swivel mount instead.
Can I still use the spacer that came with my Cove?
You will not need it. Cove includes that spacer to get their flat backplate to sit level on uneven siding. This mount solves the same problem with a solid base and an adjustable joint, so install it directly to the wall or trim.
Do I need special tools?
A PH1 and a PH2 Phillips driver, and a drill if you are going into masonry. All mounting screws are included.
Does this work on brick?
It can be anchored to brick, but for brick we usually recommend adding a brick extension so you are fastening into mortar joints rather than brick faces. Cove also advises against adhesive tape on brick and stucco.
Is this made by Cove?
No. DoorbellMount.com designs and 3D prints this mount in the USA. It is an aftermarket accessory for the Cove Doorbell Cam and is not affiliated with or endorsed by Cove Smart, LLC.
Questions? Not Sure It Is the Right Mount?
Send us a picture of your door and we will tell you which mount to get — or make you a custom one.
- Email: shop@doorbellmount.com
- Text/Call: 1-833-326-6868
- Browse every mount: DoorbellMount.com
Standard Color: Black. Contact us before ordering for white, beige, bronze, brown, or silver.
Angle Note: The 35° maximum is approximate and varies slightly with the installation surface.
3D Printed Quality: These parts are strong and weather resistant, but minor layer lines or cosmetic variation can be present. Please contact us before leaving a review if anything is not right — we will fix it.
Trademark Note: Cove and Cove Doorbell Cam are trademarks of Cove Smart, LLC. DoorbellMount.com is an independent accessory maker and is not affiliated with Cove.
Stop letting your Cove Doorbell Cam watch the wrong thing. Add the 0-35° swivel mount to your cart and aim it where it matters.